18 June 2009

Have I told you the one about the redbud tree?


ED NOTE: If you are crazy bored and don't mind weeding through baby updates to see recipes, you are more than welcome to continue to follow us on our family blog: Scott-Nems-Doots. XOXO!


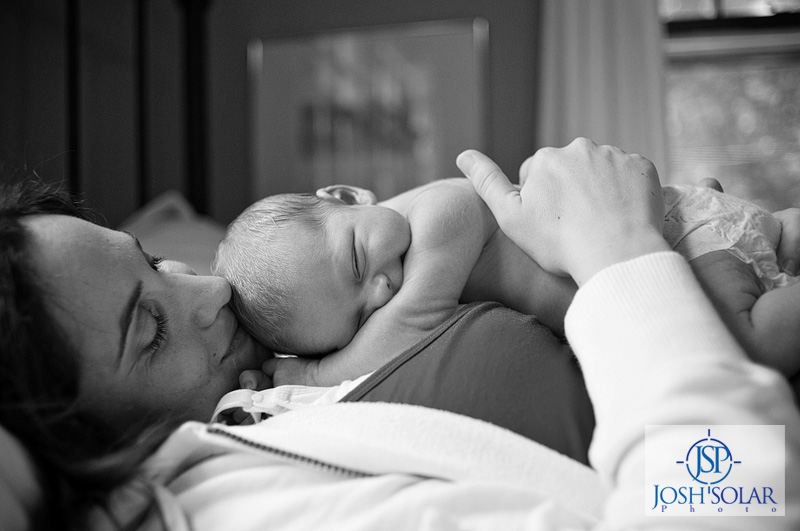
(oh and PS: image courtesy of the ever-fabulous Solar Photographers :P )
*~*~*~*~*~*~*~*~*~*~*


Not too long ago, I noticed that we have a half-dead redbud tree on our property. And by that, I mean - I was made aware by my dear Hubs that we actually have a redbud tree on our property. And it’s half dead. How is it that I’ve lived at this house for a year now, and I’ve never noticed that big ole, half-dead, half-pink-flowered tree in our backyard?

Yikes.

I think this is an appropriate time to give you an update on my life as a blogger.


As I’ve mentioned before, blogging was something I picked up on a whim in 2007, to keep myself busy. We were just married and throwing every spare penny into savings for our home and other things. That means not a ton of disposable income, and therefore I was spending A LOT of time in our wee-tiny apartment kitchen, keeping my hands busy by making all our treats and dinners at home. I always surfed through food blogs looking for something new to make, and thought they were so darling and cute. Hey, why not give it a shot? Blogging was cheap (hell, it was free!), it was a good outlet for any writing I wanted to do, and it was a way to feel productive while spinning my wheels and waiting for our “Real Life” to start.

Once I got immersed in the blogging community, I found it very addictive. This whole food blogging thing, it has a life of its own and you meet so many people and can do so many things! Suddenly I wanted to push myself to attempt more complicated recipes, to tackle new baking methods, to join a slew of baking groups and blogging events and a few contests.


When not working, I was always thinking about recipes to try. When home, I was baking and cleaning up and baking and cleaning up and baking and cleaning up…. Our grocery bills went up, as I was buying "butter, chocolate, sugar, flour" practically every trip to the grocery store. And then you add in the photographing/layout/composing time… My goodness I spent a lot of time with my butt at the computer, clicking and typing away.

And I loved every second of it.

It did take over my life a bit, though. Hubs took it like a champ and joined in the fun - he’d help me pick final recipes, would visit me in the kitchen and poke around while I baked away, and would hang out by the computer in the evenings to (*ahem* bug me) keep me company. I’d get so upset with myself if a recipe didn’t turn out exactly as I’d hoped, or if I didn’t feel quite right about what I had written. I felt a certain need to keep people happy by blogging every other day. It was a lot of pressure that I totally put on myself; I didn’t want to be one of those people who “flaked out” and quit my blog. No way, I’m not one of them. Besides, I love what I’m doing.


So I kept baking and writing through the big life milestones that came into my life. I made 6 new recipes in the evenings while we were going through that tangle of house hunting, signing all that paperwork, and finally owning a home of our own. I made the Daring Bakers Opera cake in between marathon painting sessions at our new home. I stayed up until the wee hours of the morning for 4 nights straight so I would have a back-log of posts while people visited. Then we were trying for a family, and I pushed myself to keep baking and blogging through the fun times of pregnancy exhaustion and morning sickness and food aversions…


And then suddenly I'm 9 months pregnant, standing on our back deck that I never seem to find time to enjoy, having the Hubs laugh and point out to me that half-dead redbud tree that's been in our (not-very-large) backyard this entire time.

For me, that was what finally made me stop and think. I love blogging and baking, this is true, but how much was me doing it just to not "look like a flake"? In reality, I was ignoring that whole “Real Life” thing that I was waiting for this whole time. Yeah. That isn’t right.

Ambrosia Macaroons


So I guess what I’m saying is: it’s time to retire this blog. Now, I don’t plan on taking it down at any point, so if you plan on making any past recipes you don’t need to worry about copying/pasting/what-have-you. They’ll be up until Blogger no longer exists. I am going to stop adding to this blog, though, or at least - will not be adding to it for a good long time. It’s time for me to concentrate on my family and my house and friends and all that other fun messy stuff called My Life.


I do have a personal blog, and it will probably have recipes from time to time (there is no way a food blogger can go cold turkey). If you are interested in following me on there and don’t mind all the non-foodie posts found in between recipes, leave your e-mail in the comments and I’ll send you a link.

And I leave you with this: thanks for everything, my darling readers - you really do mean a lot to me. I’ll miss ya, lots. And now I’m off to figure out what to do with a half-dead redbud tree.

Toodles,
Nemmie


Total baby deliciousness, best thing I ever baked. Photography by Josh Solar Photo.


13 June 2009

Crock Pot Cowboy Baked Beans


Hubs is the bean lover, not me. I didn't want anything unfortunate to happen to me on the Labor and Delivery table, so I kept FAR away from anything that could potentially cause... that to happen. You ladies know what I mean. Basically, I was on a diet of cheese cheese and more cheese. Anyhoo. Enough of that sort of talk on a food blog...

He really, really liked them. And they smelled really good! And they were crock pot magic, which makes it even better. If you are looking for a new bean recipe for your summer cook outs, this might be the one. Tons of flavor, tons of leftovers (for those weekday grilling evenings), and making them in the crock pot ensures that you're not heating up your kitchen. Total win!


Crock Pot Cowboy Baked Beans
(adapted from allrecipes.com)


Ingredients:
6 slices bacon
1 c. chopped white onion
2 cloves garlic, minced
1 (16 oz.) can pinto beans, drained
1 (16 oz.) can Great Northern beans, drained
1 (16 oz.) can baked beans
1 (16 oz.) can red kidney beans, drained
1 (15 oz.) can garbanzo beans, drained
3/4 c. ketchup
1/2 c. molasses
1/4 c. packed brown sugar
2 Tbsp. Worcestershire sauce
1 tsp. liquid smoke
1 Tbsp. yellow mustard
1/2 tsp. black pepper

Place bacon in a large, deep skillet. Cook over medium high heat until evenly browned. Drain, reserving 2 Tbsp. of drippings. Crumble bacon and toss in crock pot. Cook the onion and garlic in the drippings until onion is tender; drain excess grease and transfer to crock pot as well.

To the crock pot, add all remaining ingredients and combine well. Heat in crock pot on High for 1 hour, or on Low for 2-4 hours.

10 June 2009

Fresh Strawberry Bars


Hi hi! More strawberry goodness, this time on top of a lovely, soft-yet-hefty peanut butter base. From Better Homes and Gardens, of all places.


Now, some people thought it was funny that I get Better Homes and Gardens magazine, but to them I just want to say: dudes, you're missing out. Yeah, it has a faint whiff of 90s outdated dork-fest, but I seriously would not have the faintest idea how to take care of a yard/garden without it. Great magazine for beginners! It tells you what to focus on every month, what plants/flowers work well together, how to landscape, etc. etc. I have actual container gardens and cute hanging planters thanks to that magazine, and Hubs' garden is doing pretty darn good, too (although I think that's due more to his farming ancestory than my new favorite-ish magazine).


Usually the recipes in there aren't my style, but they had these strawberry bars on the cover and I couldn't resist. They were really, really good, too - I usually don't pair my strawberries with peanut butter. I'm more for strawberries and cream, or strawberries and berries, or strawberries and chocolate, or balsamic, or... well, anything but peanut butter. It is amazing, though, how well they work together! Like a really fresh-tasting PB&J sandwich :)


Fresh Strawberry Bars
(from Better Homes and Gardens, May 2009)


Ingredients:
3/4 c. unsalted butter, softened
3/4 c. peanut butter
1 c. packed brown sugar
1/2 c. granulated sugar
2 tsp. baking powder
1/4 tsp. salt
2 large eggs, room temperature
1 tsp. vanilla extract
2 1/4 c. AP flour
1/2 c. strawberry preserves
4 c. small whole strawberries, halved or quartered

Preheat oven to 350 F. Line a 9X13 pan with foil, extending foil beyond edges. Set aside.

In a large mixing bowl, beat the butter and peanut butter on medium to high for 30 seconds, until well blended. Beat in the sugars, baking powder, and salt until combined. Add eggs and vanilla; beat until combined. Beat in as much flour as you can with mixer. Stir in remaining flour.

Spread dough in prepared pan. Bake 25 minutes or until top is lightly browned and toothpick inserted near center comes out clean.

Cool completely on a cooling rack. Remove from the pan by lifting out by the foil edges. Spread preserves on top, then top with berries. Cut into bars. Serve at once or refrigerate up to 6 hours.

07 June 2009

Tart Lime Bars


This one is on honor of the Hubs, whose insatiable lime addiction overtook me during this pregnancy thing. Along with key lime pie, this was one of the rare recipes that was able to tame my cravings. At least for a little while.

Originally an Ina Garten recipe, Deb upped the salt and concentrated the filling, making for a more even crust:filling ratio. Of course, on top of this I wanted a much more tart filling, so I changed the flavor to lime (yummy!) and upped the zest content even more than she did. I would say that the normal, non-hormonal person would probably appreciate a less tart lime bar, but I made these for a book club meeting and everybody seemed to dig them. So I kept my proportions in the recipe below.

Tart Lime Bars
(adapted from Smitten Kitchen)


Ingredients:
1/2 lb. unsalted butter, at room temperature
1/2 c. granulated sugar
2 c. flour
1/8 tsp. kosher salt
4 extra-large eggs, at room temperature
1 2/3 c, granulated sugar
2 Tbsp. lime zest (4-5 limes)
2/3 c. freshly squeezed lime juice
2/3 c. flour

Confectioners’ sugar, for dusting

Preheat the oven to 350 F and grease a 9X13 baking sheet.

For the crust: cream the butter and sugar until light in the bowl of an electric mixer fitted with the paddle attachment. Combine the flour and salt and, with the mixer on low, add to the butter until just mixed. Dump the dough onto a well-floured board and gather into a ball. Flatten the dough with floured hands and press it into the greased baking sheet, building up a 1/2-inch edge on all sides. Chill.

Bake the crust for 15 to 20 minutes, until very lightly browned. Let cool on a wire rack. Leave the oven on.

For the lime layer: whisk together the eggs, sugar, lime zest, lime juice, and flour. Pour over the crust and bake for 30 to 35 minutes (less if you are using the thinner topping), or about five minutes beyond the point where the filling is set. Let cool to room temperature.

Cut into squares and dust with confectioners’ sugar.

04 June 2009

Mango Muffins


So, the Tuesdays with Dorie folks made Dorie's mango bread a few weeks ago. It looked totally good, but when I saw that Caitlin made muffins instead, I was sold. I am always up for a good muffin recipe! And mangoes were super-cheap at the market that week, a sign of fate that I needed to try these out.


Now, I must say: WATCH THE TIMER WITH THESE. The bread may take 90 minutes, but these muffins are going to take probably a third of that - I say 'probably' because I set my timer for 40 minutes, and out came hard-as-rock muffins. I stuck them in a tightly-lidded container and they softened up nicely by the second day, but they were still kinda brown.

Yummy nonetheless, though! The chunks of mango do a lot to moisten these guys up (you'll see for yourself if you mix up some of this batter), and the flavor is a.m.a.z.i.n.g. I am not a giant fan of deeply spiced things in the spring/summer (I want light and fresh instead!), but these were just delicious and not too heavy, which I loved. Plump raisins, juicy mango, fantastic mix of spices. Once again, Dorie's recipe is a winner...

Mango Muffins
(adapted from Dorie's Baking: From My Home To Yours)


Ingredients:
3 large eggs
3/4 c. flavorless oil, such as canola or safflower oil
2 1/2 c. all-purpose flour
1 c. sugar
1 tsp. baking powder
1 tsp. baking soda
1 1/2 tsp. ground ginger
1 tsp. ground cinnamon
1/4 tsp. salt
1/2 c. (packed) light brown sugar
2 c. diced mango
3/4 c. golden raisins
Grated zest of 1/2 a lime

Center a rack in the oven and preheat the oven to 350 F. Grease the top of a muffin pan, line muffin cups with paper liners, and put the pan on an insulated baking sheet or on two regular baking sheets stacked one on top of the other. (This extra insulation will keep the bottom of the muffins from overbaking).

Whisk the eggs and oil together.

In a large bowl, whisk together the flour, sugar, baking powder, baking soda, spices and salt. Rub the brown sugar between your palms into the bowl, breaking up any lumps, then stir it in. Pour the wet ingredients over the dry, switch to a sturdy rubber spatula or wooden spoon and mix until blended — the batter will be very VERY thick (really more like a dough than a batter) and not easily mixed, but persevere, it will soon come together.

Stir in the mango, raisins, and zest. Scrape the batter into the muffin cups in pan, and smooth the tops with a rubber spatula.

Bake the bread for 30-40 minutes, or until muffins are golden brown and a thin knife inserted into the center comes out clean. (If the muffins look as if they're getting too brown as they bake, cover tops loosely with a foil tent). Transfer the muffin pan to a rack and cool for 5 minutes before unmolding. Invert muffins and cool to room temperature right side up on the rack.

01 June 2009

Old Fashioned Potato Salad


This is my most favorite potato salad recipe, and I've tried lots. For one, it is very simple and easy to remember (I can make it easily from memory). If you want to snazz it up and add more, though, it takes well to any addition (sometimes I add fresh dill, or pickles, or whatever fresh gardeny goodness I have lying around). I love to cut the potato in big, rustic chunks - I think a big part of it is the texture. Plus you really get the flavor of the potato, which is, rightfully, the star.

The thing that really makes this potato salad recipe FANTASTIC is tossing the hot potato chunks with the vinegar before assembling any more of the salad - the tart, sour vinegar really gets inside the potatoes, which brightens up the dish and contrasts nicely with that creamy dressing.


Old Fashioned Potato Salad
(adapted from The Gourmet Cookbook, 2004)


Ingredients:
2 lbs. boiling potatoes (I like Yukon Golds for this, they hold up well to boiling)
3 Tbsp. cider vinegar
1 tsp. salt
3/4 c. chopped celery
1/2 c. chopped white onion
3 hard-boiled large eggs, chopped
1 c. mayonnaise
1 Tbsp. dijon mustard
Freshly ground black pepper (to taste)
Combine potatoes with well salted cold water to cover by 2 inches in a 3-qt. saucepan, and bring to a boil. reduce heat and simmer, uncovered, until potatoes are just tender, 15-25 minutes, depending on size. Drain and cool slightly.
Meanwhile, whisk together the vinegar and salt in a large bowl until the salt is dissolved.
When potatoes are just cool enough to handle (still quite warm), cut into large 1-in. chunks, adding to vinegar mixture as you cut them, tossing gently with a large spoon or spatula. Cool to room temperature.
Add all remaining ingredients and stir gently to combine. Serve at room temperature or chilled.


29 May 2009

Strawberry Pie


I loooove strawberry pie. Love it. And this is the time of year when you can make your own luscious sweet strawberry pie, thanks to all the low prices on those plump berries at the grocers and markets. Sooo good, and just so satisfying on a hot, humid-ish day. Which is exactly the kind of weather now creeping into our Kansas springs...


My parents gave me a copy of Mr. Food's version of strawberry pie, and I mixed things up a bit until I had a recipe I liked best. I changed a few of the measurements for sugar/cornstarch, I like a sweeter and denser filling. I also sliced the strawberries, it just seemed to make for not-as-messy eating and also a better proportion of berries/binder :)

I can't stress enough - be sure to chill this pie for at least a good 4 hours, although 6+ would be ideal. You want a nice, ice-cold slice to top with some whipped cream and enjoy in the heat. Mmmmm.


Strawberry Pie
(adapted from Mr. Food)


Ingredients:
1 (9-in.) deep-dish pie shell, baked and cooled
1 1/2 c. granulated sugar
4 1/2 Tbsp. cornstarch
2 c. cold water
1 (3 oz.) pkg. strawberry gelatin
1 quart strawberries, washed, hulled, and sliced

Combine sugar, cornstarch, and water in a medium saucepan. Stir and bring to a boil while stirring. Boil off until mixture is clear and thick. Add gelatin and stir to dissolve. Set aside to cool about 15-20 minutes.

After cooling for a bit, add sliced strawberries to gelatin mixture. Pour into pie shell and chill in refrigerator, at least 4 hours. Serve pie with whipped cream. Yum!

26 May 2009

Mini Lime Pavlovas


Yeah, you wanna talk about where I've been? Here's the best part, the total kicker - um, I haven't had a baby. Nope, not yet. Just got a terrible case of the "Busy Bee!"s and haven't had time to type anything up and post to the beloved blog. Yeah, I know - I pretty much suck at this blogging thing these days. But! I've been able to spend a lot of quality-time with friends and family galore before this Robot of ours shows up, so I won't let the blog make me feel too terribly guilty.


Anyhoo! On to the recipe, shall we? Now, I love a good Pavlova. The only problem is that it is so darn humid in Kansas, I rarely get the opportunity to make them in the summer months (and let's admit it, it's not really the type of thing you bust out in the wintertime). I was hosting my book club and wanted to make a dessert, and figured since hey, it was pretty nice, I'd make Pavlovas. I baked them off the night before and planned on serving them with strawberries and kiwi.

So of course, it rained that evening. And the next day. And the next...

So while they were mighty delicious, the Pavlovas were also a bit sad looking. They *poof* fell apart with the slightest touch, so what you're seeing in pictures is a nice, sadly crumbled Pavlova. No matter, though - what they lacked in presentation, they more than made up for in taste. I love Pavlovas because they have that soft, melt-on-your-tongue outer meringue with a lovely, smooshy, marshmallow-like interior. Add some light whipped cream and fruit, and it's absolute heaven.

Also I should note: as far as desserts go, this one is about as healthy as it gets if you go easy on the whipping cream! A note to Kris and Alfie: you can sub the fine sugar with Splenda, just cut down about 1/4 of the amount. It'll turn out the same but will be sugar free!


Mini Lime Pavlovas
(adapted from sadly I can't remember where, but I swiped a mini Pav recipe and worked from there...)


Ingredients:
4 large egg whites, at room temperature
Pinch of salt
1 c. fine granulated (baker's) sugar
2 tsp. cornstarch
2 tsp. white wine vinegar
Zest of 1/2 of a lime
1/2 tsp. vanilla extract
Whipped cream
Sliced fruit

Preheat oven to 180 F. Place 2 sheets of parchment paper on 2 sheet pans. Draw several small circles on the paper, using a small ramekin or similar item as a guide, then turn them over so the circles are on the reverse side (this way you won't get pencil marks on your meringue).
Place the egg whites and salt in the bowl of an electric mixer fitted with the whisk attachment. Beat the egg whites on high speed until firm, about a minute. With the mixer on high, slowly add the sugar and beat until it makes firm, shiny peaks, about 2 minutes.

Remove the bowl from the mixer, sift the cornstarch onto the beaten egg whites, add the vinegar, zest, and vanilla, and carefully fold them lightly with a rubber spatula. Pile the meringue on your circle outlines, making a small indentation in the middle (for your cream and fruit later). We're not going for gorgeous and smooth here - rough edges are prettier with this dessert anyway, so just pile them on with that spatula.

Bake for 90 minutes. Turn off the oven, keep the door closed, and leave the mini Pavlovas in the oven for about an hour. They should be crisp on the outside and soft inside.

To serve: place one mini Pavlova on each plate. Top with whipped cream and fruit.


20 April 2009

Italian Love Cake


Hubs made fun of the name, but he still ate the heck out of this cake. So there. It has a rather heavy texture (the ricotta bakes into the cake portion, which is the reason for this) but that light top layer of cream and pudding evens things out nicely. It tastes a bit like tiramisu, if you're into that sort of thing. Pretty good stuff, and a heck of a lot easier than dipping all those ladyfingers in espresso and laying them out...

Italian Love Cake
(from the lovely Leslie)


Ingredients:
1 box marble cake mix
1 large container (~2 lb.) ricotta cheese
1 tsp. vanilla
3/4 c. sugar
4 eggs
1 pkg. instant chocolate pudding
1 c. milk
1 container Cool Whip

Prepare marble cake mix according to directions, and pour into a (greased and floured) 9X13 pan.

Mix eggs, cheese, sugar, vanilla and pour over cake mix. Bake 1 hour at 350 F. Cool cake-completely!

Mix pudding mix with 1 cup milk. Beat 3 minutes. Add Cool Whip and spread over cake. Refrigerate cake.

Leslie's note: "I normally make this the day before so its completely set up and cold. "

18 April 2009

Tinnie Cheesecake


I made my last trip (for awhile, anyway) down to see family this past weekend - and they were kind enough to make me a lovely lunch and shower the baby Robot with gifts :) I am spoiled and so is this child, I've decided. I'm spoiled mostly because my sister Miss Tinnie brought out the big guns, and made her awesome cheesecake.

This is The Best Cheesecake Ever. It is actually her version of one of those "kopy kat" recipes, a take on the Copeland's famous cheesecake recipe. I personally have never had the Copeland's version, but according to Miss Tinnie it is The Bomb. If it really does taste like this cheesecake, then I am a believer.


This version is dense and creamy but light, definitely not a baked cheesecake. It's a mile high and sits on a thick, awesomely nutty crust. It's the crust that gets ya. I begged for the recipe and Tinnie was gracious enough to share her version with me. And I'm sharing it with you. Err, it's probably safe to say she won't be sharing anymore recipes with me any time soon...


Tinnie Cheesecake


Ingredients:
1/2 c. Bisquick biscuit mix
3/4 c. flour
1 c. pecans, chopped
3/4 c. dark brown sugar
1 stick unsalted butter
5 pkgs. (40 oz.) cream cheese, softened to room temperature
1 c. sugar (make sure it's a "heaping" cup)
2 Tbsp. vanilla extract
16 oz. whipped topping

For crust:
Preheat oven 350 F.

Combine all dry ingredients, breaking up any large pieces of brown sugar. Add pecan pieces and melted butter and mix thoroughly. Press mixture evenly into a 10-inch springform pan. Place pan on a baking sheet and place in the oven for 13 minutes. Allow to cool at room temperature.

For filling:
Cream together softened cream cheese and sugar and vanilla until smooth. Approximately 5 minutes on high speed, scraping sides of bowl occasionally. Fold in whipped topping gently until mixture is smooth. Using rubber spatula scoop into pre-baked crust and smooth the top. Cover tightly with plastic wrap and freeze overnight or at least 8 hours.

At least 30 minutes before serving remove from freezer and place at room temperature. Cut and serve with your favorite topping or plain.

17 April 2009

Mmmm.


We are too busy enjoying Orangina to blog these days. Will be back this weekend, my pets.
XOXO
Miss Tinnie, Nemmie, and Mahni

12 April 2009

(Not Really Key) Lime Pie


Spring in Kansas – it’s true that you just never know what you’re going to get. Every once in awhile - in between that barometric see-saw of cold snaps, then hot and dreadfully humid thunderstorms, then gloomy chilly days- you get that gorgeous day. Sunny, not a cloud in the sky, temps in the low 70s. Just beautiful.

We had one of those days recently, and believe me they are cherished when they show up. I rushed home from work and threw open all the windows. When Hubs got off work, we did our usual warm-weather ritual and went up to campus for a long walk up and down The Hill. Well, okay I should be honest it’s our second-most-common ritual - the first being walking Mass St. and having a beer on the patio at Free State, but I wasn’t quite up for that one this year…

Anyhoo, nice weather just makes a person hungry for certain things, so we both agreed on salads for dinner. But I was also craving something sweet and tart, one of those cravings for dessert you get on a beautiful day. And I knew the perfect dessert. So when we stopped at the grocery store on the way home to grab salad goodies, I also picked up a can of sweetened condensed milk and a bunch of limes. Nothing celebrates the warm weather like a lime pie.


Notice I didn’t say “key lime”, that’s because I rarely use key limes when making this pie. No worries. It is still delicious, I assure you. This recipe rocks because it is not only easy (I pretty much have it memorized), but it is incredibly quick. Hubs took a shower when we got home from our walk, and by the time he walked back into the kitchen to help with salads I was pulling the finished pie out of the oven to cool.

It really is your classic lime pie – sweet and yet tart tart tart, creamy and cool with a nice crunchy crust. Perfect. You can, you know, ruin it by adding a meringue topping or whipped cream if you’d like, but I think it’s just right on its own.


(Not Really Key) Lime Pie
(from Tate’s Bake Shop Cookbook, 2005)


Ingredients:
For crust:
1 1/4 c. graham cracker crumbs, fine ground
1 Tbsp. sugar
5 Tbsp. salted butter, melted

For filling:
4 large egg yolks
1 Tbsp. lime zest (I probably used more like 2 Tbsp. We love the tart)
1 (14 oz.) can sweetened condensed milk
1/2 c. fresh lime juice (about 4 limes’ worth)

Prepare the crust: In a medium bowl, combine the graham cracker crumbs and sugar. Stir in melted butter (I add this with my hands, but a wooden spoon will do fine). Press evenly into the bottom and sides of a 9-inch pie pan. Bake off the crust for 10 minutes at 325 F. Cool completely.

Prepare the filling: In a large bowl using an electric mixer, beat the yolks and lime zest until smooth. Beat in the milk, then slowly beat in the lime juice. Beat mixture continuously until smooth.

Pour the filling into the prepared crust. Bake at 350 F for 10 minutes. Cool to room temperature, then place in the fridge to cool until set (about 2 hours).